-
Internship Blog #7
When pressing records, it is important to make test pressings and listen to them beforehand to make sure there are no issues with the stampers. While some can be listened to in the plant, others require special attention and are listened to through the studio speakers. I had the chance to help listen to some of the test pressings in studio B. The main thing I was listening for was any noticeable scratches or skips that would indicate a problem. I spent time actively listening through the record in its entirety, taking note if any abnormalities in the sound arose.
The records are also visually inspected after coming off of the press. Typically, we will inspect 50 records out of every stack of 100. Occasionally, people will be more particular and request every record to be inspected. When inspecting the records, I remove them from their sleeves and hold them underneath a light to reveal the grooves. Spinning the record around, I examine the grooves looking for any scratches or imperfections that could affect the sound. Scratches are the most common, however some will have heat bubbles or stains. When I come across a questionable record, I set it aside so John or JR can take a second look and determine if it needs to be replaced. This can be a time-consuming process, but it is worth doing to ensure that the records being sent out are of the best quality.
-
Internship Blog #6
When working Musicol, I had a chance to meet Scott who is in charge of cutting lacquers. This is an old method of vinyl mastering that uses a lathe to cut grooves into a lacquer disk. The lathe has a cutting head with two coils for the left and right channels. The coils move a heated stylus which cuts grooves into the lacquer coated plate. It is important that you create a few test grooves to make sure everything sounds okay before cutting grooves for an entire record. The cutting stage is also where the RPM is decided, which for our records today is usually 33 1/3 or 45 RPM
Since lacquer is much softer than vinyl, it is more prone to scratching and must be handled with extra care. Each side is cut into a separate lacquer coated disk, and then sent off to one of our stamper manufacturers. At the stamper plant, lacquers go through the process of electroplating. This involves a nickel bath to transfer the metal onto the lacquer plate. The plate is then destroyed, and we are left with the “father” part which has inverted grooves. The father is then inverted again to make the “mother”, a metal copy of the original lacquer. The mother is then inspected and played back before being used to make the stampers themselves. Once the final stampers are created, they are sent back to us, polished, and used to press the grooves into the vinyl.
-
Internship Blog #5
Another session that I was part of was with a local singer-songwriter who hired a band to work with her on a song. I met engineer Keith Hanlon— who does the majority of recordings at Musicol— and got to work on miking up instruments. Keith had made an input list and had microphones chosen already, and it was nice to have a reference point to look back on when setting up. There were a few inputs that were not working so we had to make some changes to get signal. I gathered headphone boxes, placed them in front of each person, and grabbed everyone’s headphones as well. After ensuring everything was plugged in and switched on, I put tape on each box and labeled each knob with the corresponding instrument. Once the headphones were set up, we checked levels for each mic and set the gain. This was a fairly quick process, and we got to recording the song. The band had requested a practice run, and we decided to hit record just in case. After a few run-throughs and experimenting with a click track, we were able to settle on a tempo for the song. We recorded drums, bass, electric guitar, acoustic guitar, and scratch vocals. After getting several takes we were able to settle on one that sounded good. After the full band recording, the singer decided she wanted to record keyboard over top. We set up a DI box and recorded a few takes of the keys, which added a nice string-like sound in the background. This recording was very exciting to be a part of, and it was nice to get to work with a full band this time.
-
Internship Blog #4
During my time at musical, I have gotten the chance to help out in the studio with recording sessions. For the first session, I worked with engineer Dylan and helped record a project with his band. Before the bandmates arrived, we had to troubleshoot a few broken inputs, as well as identify a few broken channels on the board. I stayed in the studio and talked into mics to make sure we were getting signal. Once all the microphones were set up, I met the bandmates and took a seat behind the board to observe Dylan. I watched his workflow as he navigated Reaper, a DAW that I had heard about but had no experience using. We tracked scratch vocals, acoustic guitar, and djembe together and got a few good takes. We then tracked vocals alone in the studio, getting several takes. Once we got good takes of the vocals, Dylan grabbed his guitar and we recorded his guitar part overtop, as well as some group vocals and claps with the entire band. For this part of the session, I was in charge of hitting record and getting several takes of each part. Once we wrapped things up, I got back in the studio to help put away mics and cables. Overall, it was very valuable studio experience as I was able to learn about a different software, help where needed, and even jump in and run the session.

Here is the control room in Studio A at Musicol, with the band’s session pulled up on the monitors.
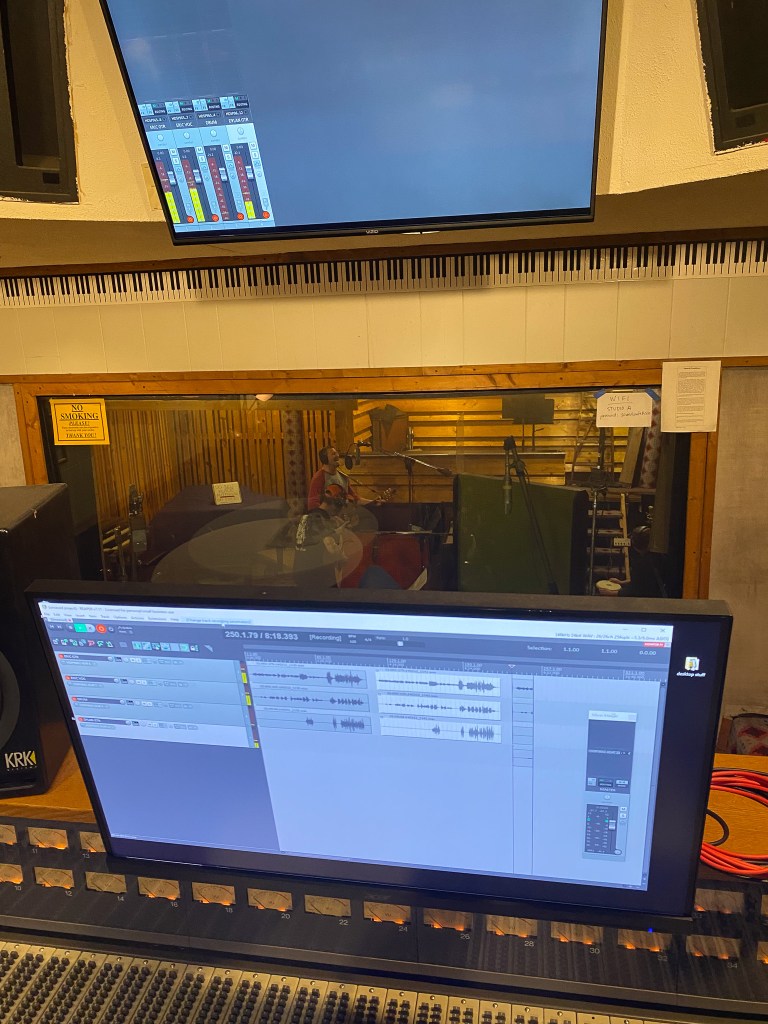
This is a photo I took from when I was running the session.
-
Internship Blog #3
Oftentimes, an order will have jackets that need stuffed in house. We have the jackets sent to us, as well as any insets that the artist wants to include. These are often lyric sheets, but sometimes digital download cards are included too. The inserts go with the records inside the jackets, and then are set aside to be bagged up. We shrink wrap all of our records by hand using the bagging machine and shrink tunnel. I typically bag all of the records first and set them aside in boxes. I try to keep track of the count in each box, so no surprises arise down the line.
Here is a photo of a record in the bagging machine ready to be sealed.

And here are records that have been bagged but not yet sent through the shrink tunnel.
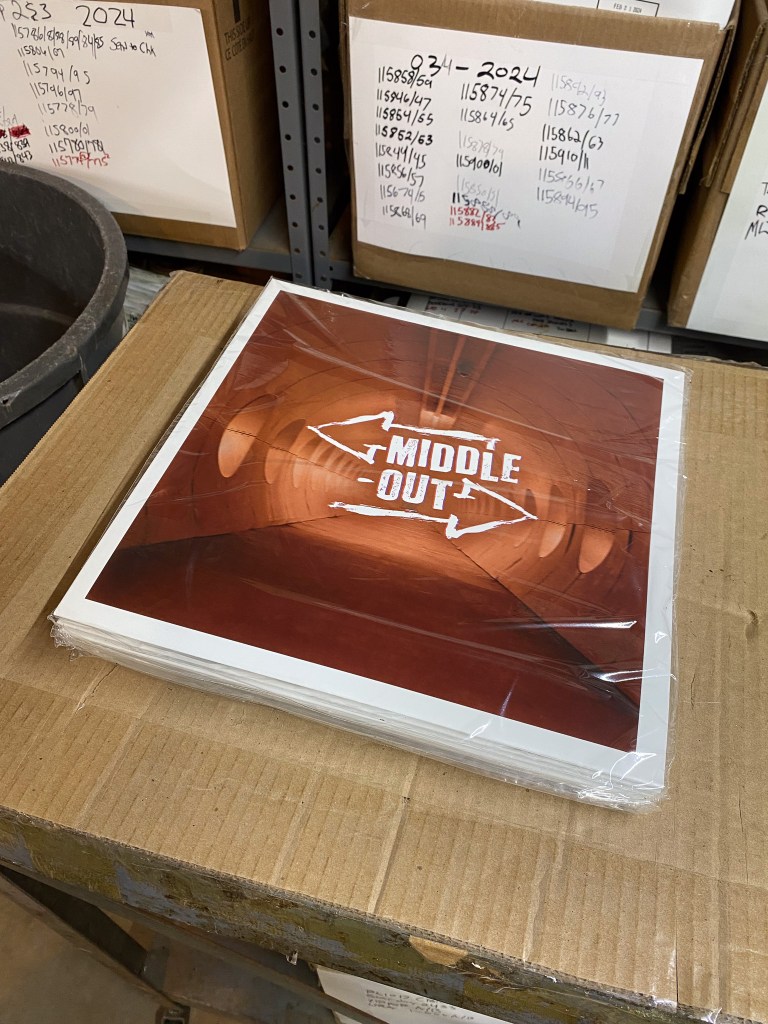
Once the records are all bagged, I send each box through the shrink tunnel. When they come out on the other end, I check each one to make sure there are no tears in the shrink wrap and I put them in boxes. When we box up records, we do stacks of 10 and flip them each grouping so that you can clearly see how many are in each box.
-
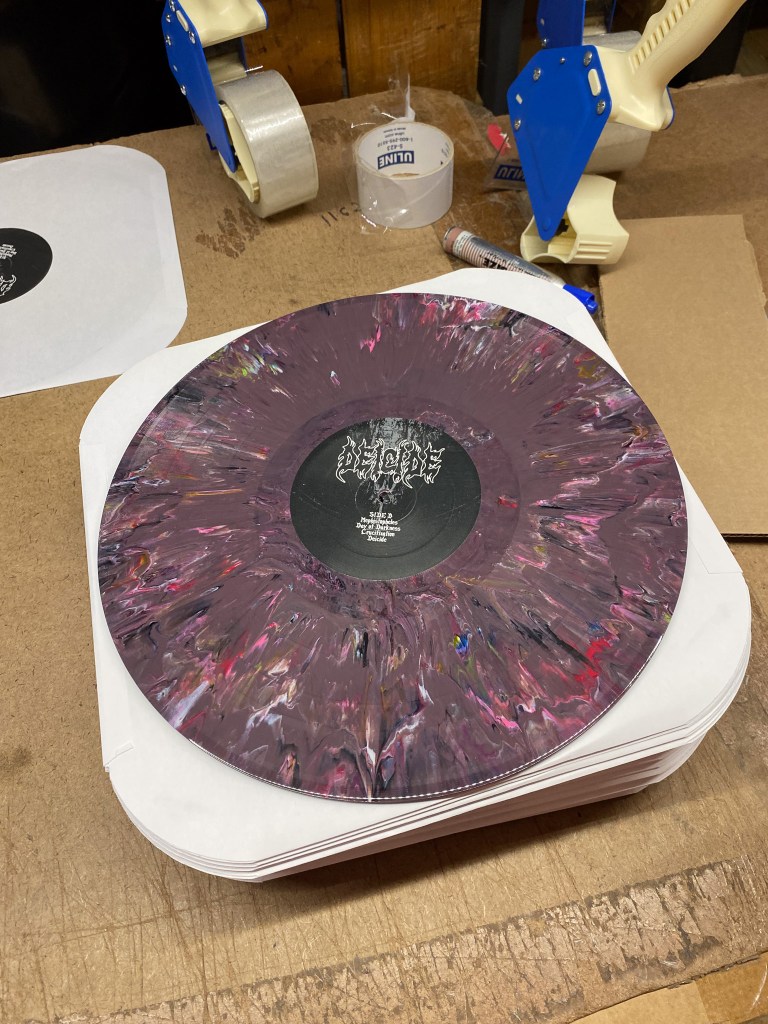
Internship Blog #2
At Musicol, lots of records are pressed in various colors. All records start off as vinyl pellets that arrive at the shop in large bags. We sift these pellets through a special sifter and into buckets. These buckets are then set aside and covered, to prevent any other colors from accidentally mixing in. Each color has a different process for being made. Some solid colors are very simple, such as red, white, gold, clear, and blue. Other colors require us to mix 2 or more together. We use coffee cans as a form of measurement. I have made opaque orange using 2 cans of gold, ½ can of red, and a few handfuls of white. Purple is a similar process, using two scoops of red and 1/3 scoop of blue. To make it opaque, we will add a few handfuls of white. We repeat this process as necessary to fill however many buckets we need, stirring the colors together in between. Even our black vinyl requires some mixing. We have a large box in the back that gets filled with shipments of virgin black vinyl. We sift out 8 scoops of the virgin black and mix it with 3 scoops of our recycled black grounds made from record scraps. We recycle all of our vinyl that can’t be sent out, as well as any scraps left from when they are cut. Occasionally someone will request an order using these recycled grounds, and they can turn out to be very cool looking pressings. Here are a few photos of pressings that I mixed the colors for.
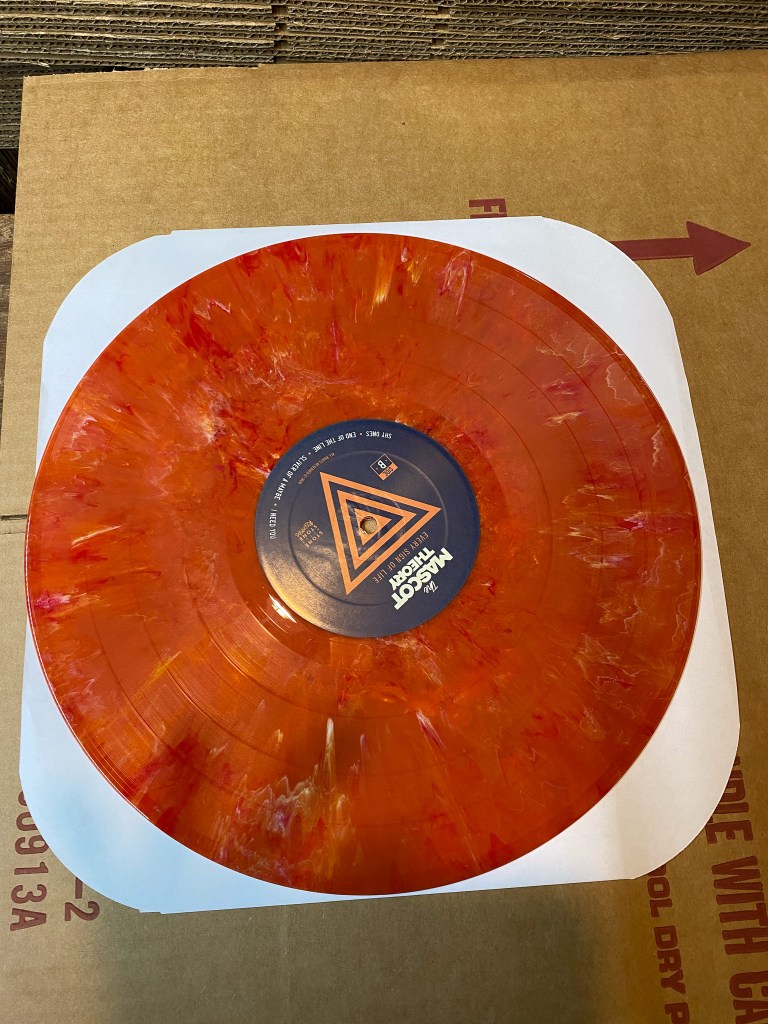
Opaque Orange Swirl
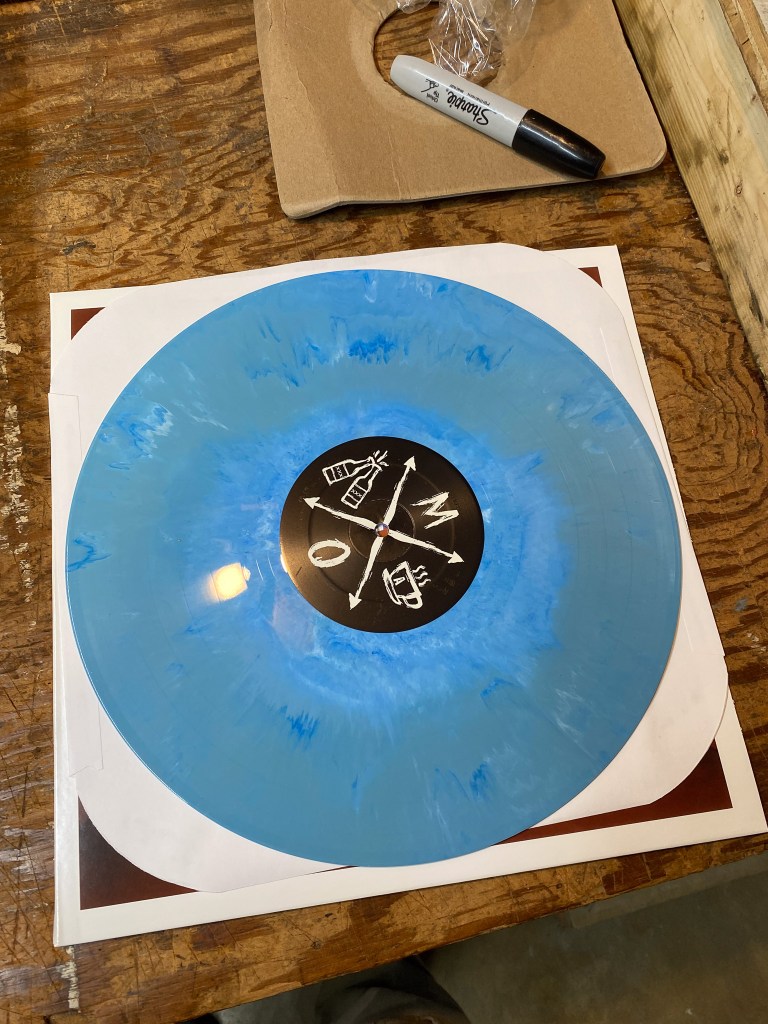
Sky Blue
Recycled “Trash Vinyl”
-
Internship Blog #1
For the first week of my internship at Musicol in Columbus, Ohio, the focus was to get me acquainted with the place and learn some of the basic tasks like counting sleeves and prepping boxes. We get our 7” and 12” sleeves in boxes that we take down to the basement to be counted out for orders. We count them in 10s so that whoever is running the vinyl press can keep count of how many are done. For the 7-inch sleeves, we stack them vertically on a tall spindle and separate them by test pressings or scrap records. A record is put down, and then stacks of 10 are counted and stacked on top of each other in an alternating pattern until there are 100. Another record is stacked on top, followed by another 100 sleeves. This repeats until we reach the top of the spindle, usually 600 sleeves total. For the 12” LP sleeves, we use a slightly different method. A flat piece of cardboard is set out and 5 groupings of 10 are stacked in an alternating overlapping pattern on the left side of the cardboard. This process then repeats on the right side, overlapping the sleeves on the left. This process repeats until we reach 500 total sleeves. As we moved later into the week, I learned to stuff record jackets and apply stickers on orders.
-
Pre Production Notes: The Reverie EP
At the Beginning of February, I had the chance to meet all members of The Reverie and discuss their upcoming recording session. Through these conversations, I was able gather some very useful information about the band that will help me make decisions in preparation for recording. I asked about the recording process for their first song in attempt to learn about any specific recording preferences the band has. I also was able to learn a lot about the sound they are after, and the different bands and artists that they draw inspiration from.
The first thing that I wanted to discuss with the band was their general instrumentation and the microphone needs for each player. The band consists of Kensie: Vocals and Keys, Peyton: Vocals and Guitar, Adam: Vocals, and Timmion: Drums. It was mentioned that Timmion typically plays on an electronic kit and will be bringing those, but expressed interest in using the kit available in the studio. The band currently has only recorded one song, and they recorded each part separately putting them together after the fact. I advocated for the idea of trying to record together to a multitrack, and suggested that the band come prepared to record as such. Since this is only the band’s second time recording, I have to make it a goal to be flexible and facilitate a productive session while not overcomplicating things.
Additionally, I asked for some demo recordings if they had them, as well as any bands or artists that influence their sound. The band was able to provide me with a demo recording of one of their songs entitled “Summer of 17”. This was the only song I was able to obtain a demo of, however they did share song titles for the other two songs they plan on recording. As for artist inspirations, The Reverie is influenced by The Backseat Lovers, Briston Maroney, and peach pit. No specific songs were mentioned, but I took responsibility to make a playlist with songs from each artist in order to get a feel for the sound that the band is after.
Since the band does not have a lot of prior studio experience and is open to trying different things, it gives me a lot of freedom to make different choices with use of pre amps, microphones, and outboard gear. It also puts a lot of pressure on me as the engineer, as I have to use my best judgement to make the right decisions for the band under a tight time frame. In preparation for recording this weekend, I have tasked myself with a few projects to keep myself organized. First, I plan on creating a rough input list that I can use to lay out my initial decisions of microphones, mic inputs, and pre-amps. I plan to put a good amount of research behind these decisions, looking back on past shootout assignments and doing some additional testing of my own. From this list, I plan to create a few templates in protools that I can easily import to the session of whatever song I’m recording. I want to account for the different needs of each song, and make sure I’m prepared to record both live and electronic drums. Finally, I would like to create logistics sheets for each session to lay out general time goals. This will provide framework to stay on track and keep things moving along. The coming blog entries will highlight these tasks and my process of completing them, as well as how they will help me in the future.
-
Project: The Reverie EP
This month, I have taken on the project of recording three songs for The Reverie’s new EP they are working on. I got in contact with the band at the beginning of January, and have been having discussions with them in preparation for recording.
Lyric Video for “Stay” The Reverie is a 5 person independent band based in Sidney, Ohio. Their first single, “Stay” debut last October and is available to stream on all platforms. Check it out on Spotify.
In taking on this project, there are a few personal goals that I have set for myself. One of the overarching goals of this project for me is to grow my craft in the studio, and to be able to move quickly and efficiently during the session. There are also some specific pre-production practices that I will be highlighting during this project. These include meeting with the band to discuss specifics, familiarizing myself with the band’s musical influences, and creating Protools sessions and input lists in advance. A big question that I am asking throughout this entire project is how can I use recording and mixing techniques to highlight a band’s unique sound.
-
Video Game Trailer with Pro Tools MIDI


-
Subscribe
Subscribed
Already have a WordPress.com account? Log in now.
